Apple Pie Filling for Water Bath Canning
Apple pie is one of my favorite things to make during these autumn months….along with Apple Crisp! I’d been wanting to can some Apple Pie Filling for a long time, but I was intimidated by my visions of the sticky mess and the large amounts of sugar. Honestly, I really don’t mind preparing fresh apples at the time of baking the pie, or crisp. I always have happy helpers for such projects and usually have great apple choices into the cold seasons.
In this recipe I did not adjust the amount of sugar. However, I must admit that we will not be pouring out that pie filling and using it just as it is, because our family simply doesn’t enjoy that amount of sweetness. I actually used the partial quart of filling and doubled its volume with freshly sliced apples for a nice baked apple dish for our supper that night and my family loved it. I’ll plan on adding more apples when I use my filling to make my pies.
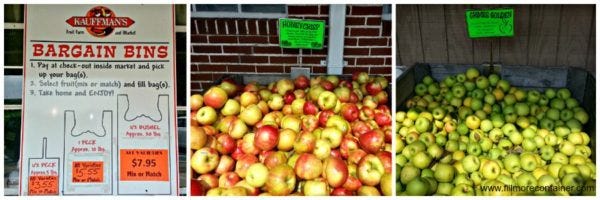
Most of the recipes call for crisp and tart apples – to balance the sweetness of the sugar and to hold up through the blanching, canning and then the baking. We’ve always been impressed with the quality and selection at Kauffman’s Fruit Farm, so that’s where I headed for my apples. I decided to go with a combination of Jonagold, Honey Crisp and Grimes Golden apples. These are great for baking and for snacking!
Recipe
After going through many recipes, I landed on the Apple Pie Filling Recipe from the National Center for Home Food Preservation as my primary – I like that it has the recipe for 1 quart as well as a canner full – 7 quarts.
Ingredients Chart by Yield:
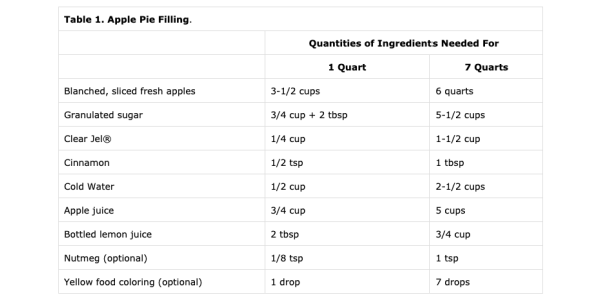
*Variations: The brown sugar and the cider create a rich deep color and more of a caramel taste which we love. If you wish for a filling with a little more clarity, you can use white sugar instead of the brown; and apple juice instead of the apple cider.
Instructions
Prepare your water bath, clean jars and lids according to manufacturer recommendations.
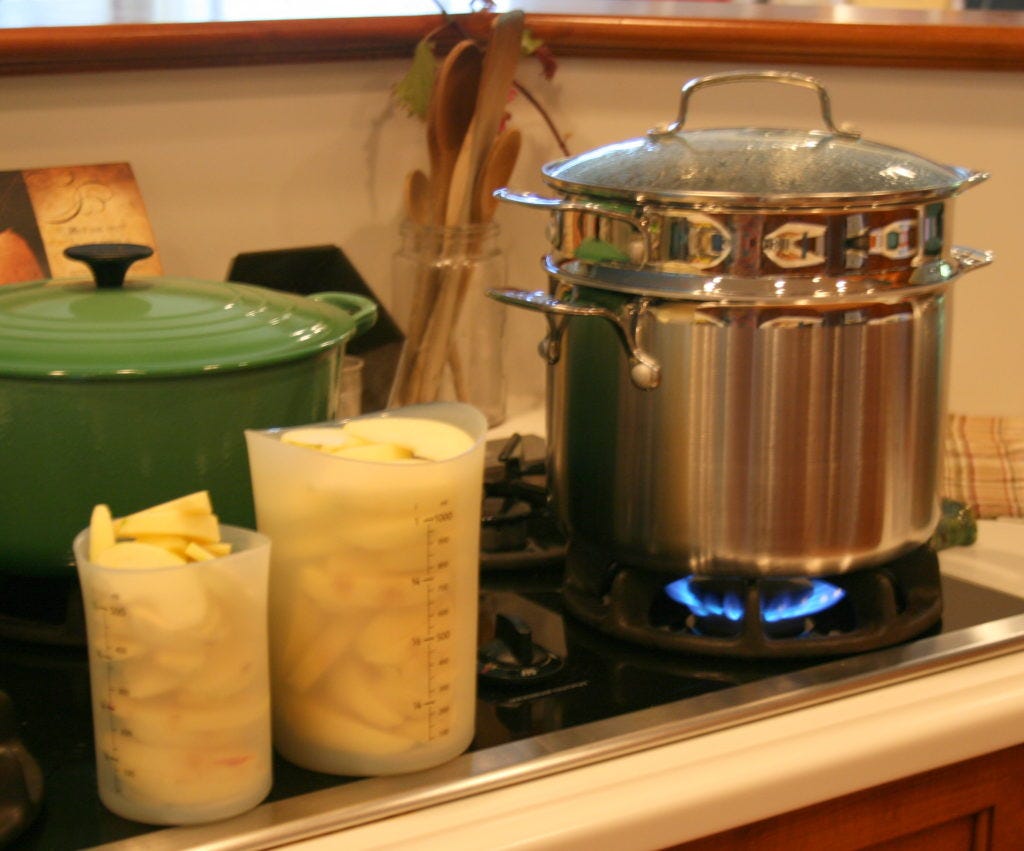
Prepare and blanch apples:
In a large kettle, bring a gallon of water to boil on the stove. (My pasta cooker worked well for removing the blanched apples quickly from the heat.)
Wash, peel, core and slice your apples to ½ inch thick slices. You may wish to use a fruit fresh (ascorbic acid) bath to hold your slices until blanching. I did not…my apples were so easy to prepare and I was able to get the 6 cups for blanching before browning occurred.
Don’t blanch for longer than 1 minute!
I got a phone call in the middle of my first batch…it only seemed like an extra 30 seconds, but they went to MUSH! My kids loved the naked apple sauce when they got home, but I had to blanch another batch. It’s important that your slices can still hold their shape or they will begin to break down or be too easily broken in the folding, canning and baking that will follow.
Continue blanching the remaining batches in a covered container.
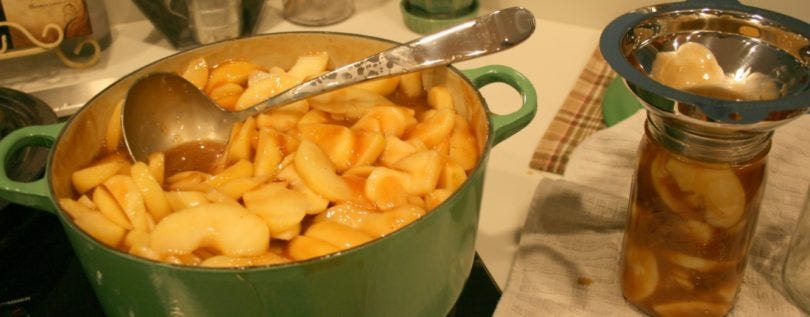
Make your Sauce:
Combine the sugar, Clear Jel, cinnamon, nutmeg, water and cider (or juice) in a very large kettle. Cook on medium heat while stirring until the sauce begins to thicken and bubble. Add the lemon juice and with constant stirring, bring to a boil for 1 minute.
Remove the sauce from the heat, promptly fold in the apple slices and immediately fill your clean jars with the mixture. Be sure to leave 1 inch headspace. The contents will expand…so be very careful to not overfill! Apply lids and process in the water bath for the time indicated by the NCHFP for your altitude.
For Quart or Pint Jars:
25 minutes (1 – 1,000 ft)
30 minutes (1,001 – 3,000 ft)
35 minutes (3,001 – 6,000 ft)
40 minutes (above 6,000 ft)
When the time is up, turn heat off and allow to rest for 5 minutes before removing jars. Carefully remove jars from the canner and place on a towel covered counter to cool. Leave untouched for 24 hours. Remove bands, wash off outside of jars and check seals. Refrigerate any jars that are unsealed.


I had made this same recipe last year and agree that it is WAY too sweet. I added in fresh apples as well. This year I made it with 1/4 of the sugar, used brown sugar and used cider syrup I had made earlier. The flavor was great and it wasn’t so cloyingly sweet as last year’s version.
What if you’d like to can pints… same recipe / processing?
Yes, Jennifer.