Pressure Canning Ground Beef, Venison and Taco Meat
In our home, taco salads are great meals any time of the year, and make for wonderful leftovers. Pressure canning ground beef, venison, and taco meat make meals during our busy time easier to pull together – no thawing & browning of meat needed! In addition, the taco meat, in particular, makes it so convenient for those packing lunches to grab a pint of taco meat from the shelf to accompany their salad or taco meal. This homemade bulk taco seasoning recipe will help you streamline your process even more!
With family members who raise beef cattle and who hunt, we have no shortage of good, lean ground beef or venison. Whether you’re planning to pressure can ground browned meat on its own or with the taco seasoning, you can use beef, venison, or a blend of them. If you don’t have those contacts, this is a great way to take advantage of meat sales at your local grocer.
Considerations when planning to pressure can browned ground beef, venison, or taco meat
- Is meat frozen? It can take a good 24 hours to thaw in your refrigerator. Obviously, it will take less time to brown if it’s thawed.
- Do you have enough refrigeration space? Whether it’s frozen or fresh, keep your refrigeration space & your schedule in mind so that you can store it until you can process it.
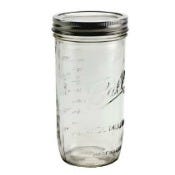
- What size jars will you use…and how many? This may depend on the capacity of your pressure canner, the amount of meat you wish to can, and the portions your family will use. You will need to do the calculation on how much thawed meat you want and how many batches you will process. Typically, a pound of meat will yield a pint, but there is variation on how lean or fatty the meat is, and how much weight/volume you will lose when you remove that. (You will want to remove as much fat as possible.) We did pints because my pressure canner could hold 2 layers of pints (15 wide mouth pint jars) but only 1 layer of the 24oz (8 wide mouth 24oz jars) or quarts
- How much time do you have? You will need to brown the meat first, jar them, bring the canner up to pressure, process them for 75 minutes (pints) or 90 minutes (24oz or quarts) and allow the canner to properly cool before opening it and before removing the jars. From start (thawed, raw meat) to finish (removing the lid from the pressure canner) the process could easily take 2.5 – 3 hours depending on how quickly you can brown the meat and get it jarred and into the canner. Sometimes people let the jars sit in the canner (after it has cooled enough to take the lid off safely) to finish cooling overnight.
Ground Beef or Venison Preparation and Canning Procedures:
Gather and prepare your necessary equipment:
- Pressure canner – with about 3 inches of hot water (can begin warming this as you near the end of browning your meat)
- Skillet/kettle for browning meat
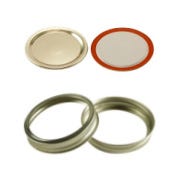
- Warm clean jars, fresh lids & clean bands. Place your clean jars to be used into another large kettle or tub with hot water. The purpose is to warm them up, so they aren’t shocked by the hot meat & broth placed in them. This is not to sterilize them. I place a large kettle in my kitchen sink, put jars in, and fill it with hot tap water while my meat is cooking.
- 4th burner pot or tea kettle for boiling water or broth (will be poured into jars after meat)
- Funnel and scooper (1 cup measure works well)
- Bubbling tool – chopstick, plastic knife or plastic bubbling tool from a canning kit.
- Jar lifter
Prepare the Meat
In a large skillet or kettle, begin to brown the ground meat until it is fully cooked and lightly browned, and remove excess fat. If you are adding taco seasoning or a bit of salt, you can add it after you remove the fat and mix well to ensure the seasoning is evenly dispersed.
While the meat is cooking, make sure you have the water or broth for topping off the jars of meat (I only needed a little less than 2 quarts to top off my 15 pint jars), your jars warming, and your lids & bands and jar filling tools ready. You can begin warming your pressure canner (with the lid off) so that it doesn’t take as long to come up to temperature. Be careful not to boil away your water in the process, as you should have about 3 inches before you begin putting jars into it.
Pressure Canning the Meat
- Scoop the browned hot meat into the jars. You can gently tap them on a folded towel or hot pad to encourage the meat to settle into the jar, but do not press it into the jar, or it will be too dense and may interfere with the proper processing.
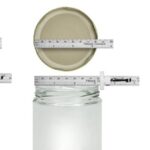
- Top off the jar with the boiling water or broth, allowing 1 inch of headspace.
- Bubble your jars with a plastic knife, chopstick, or bubbling tool.
- Wipe the rim of jars with a clean hot cloth or paper towel.
- Place lids on the jars, and apply bands or rings with appropriate tightness. (If you are using Ball or the bulk Tecnocap lids from Fillmore Container, follow their guidelines – not too tight. If you are using the newer Superb lids, just tighten the ring enough so that it grabs the jar.)
- Place into your pressure canner following the guidelines of the specific canner you are using.
- Process according to the following recommendations from the NCHFP:
It’s important to allow your pressure canner to cool sufficiently, according to the manufacturer’s instructions, prior to removing the lid. We took this video after removing the lid, and you can see that the contents of the jars are still boiling. It’s a good idea to let them continue to rest/cool more before moving them out of the pressure canner.
Get our homemade taco seasoning recipe or learn more about canning venison.


0 Comments